There’s a certain magic that fills the air when you step into a shopping mall – a sweet, yeasty aroma that instantly transports you to a happy place. For millions, that smell is synonymous with Auntie Anne’s Pretzels, the iconic purveyor of warm, soft, buttery, and often cinnamon-sugar-dusted delights. The good news? You don't need a trip to the mall to satisfy that craving. With the right techniques and a passion for baking, you can achieve nearly identical results right in your own kitchen! This comprehensive guide will walk you through everything you need to know to master the ultimate auntie annes pretzels copycat recipe, transforming your home into the happiest pretzel bakery on the block.
The Quest for the Perfect Pretzel Texture: Dough Secrets Revealed
The foundation of any great pretzel is its dough. Auntie Anne's pretzels are renowned for their incredible chewiness combined with a delicate softness. Achieving this balance at home is key to a successful copycat recipe.
Choosing Your Ingredients Wisely
- Flour: While all-purpose flour can work, many enthusiasts find that bread flour yields a chewier texture closer to the original. Its higher protein content develops more gluten, which is crucial for that characteristic stretch and bite.
- Yeast: Active dry yeast or instant yeast will both work. If using active dry, ensure your water is between 105-115°F (40-46°C) to activate it properly. Instant yeast can often be mixed directly with dry ingredients.
- Sugar: Granulated sugar not only sweetens the dough slightly but, more importantly, provides food for the yeast, helping it activate and rise.
- Salt: Essential for flavor, salt also helps control yeast activity. Don't skip it!
- Warm Water: Crucial for activating the yeast without killing it. If it's too hot, goodbye yeast; too cold, and it won't activate.
- Melted Butter: Incorporated into the dough, butter adds richness and contributes to that tender, soft crumb.
The Art of Kneading and Rising
Proper kneading is non-negotiable for a perfect pretzel dough. It develops the gluten, creating the elasticity and strength needed for shaping and that signature chewy texture.
- Kneading by Hand: If you're going old-school, be prepared to knead for 8-10 minutes. The dough should become smooth, elastic, and spring back when poked.
- Stand Mixer: A stand mixer with a dough hook is a baker's best friend here. Knead on medium speed for 5-7 minutes until the dough pulls away from the sides of the bowl and forms a smooth ball.
After kneading, your dough needs time to rise, allowing the yeast to do its magic and create air pockets. Place the dough in a lightly oiled bowl, cover it with plastic wrap or a damp towel, and let it rise in a warm, draft-free place for 45-60 minutes, or until it has doubled in size. This first rise is vital for flavor development and texture.
The Essential Pretzel Bath: Why Baking Soda is Your Best Friend
This is arguably the most crucial step that separates a regular bread stick from an authentic pretzel. The baking soda bath is what gives pretzels their distinct dark brown, slightly crisp exterior and unique flavor profile. It's the secret weapon in any great auntie annes pretzels copycat recipe.
Understanding the Science
Traditional German pretzels use a lye solution, which is highly alkaline and produces an intensely deep brown crust and strong pretzel flavor. For home bakers, lye is dangerous and impractical. Enter baking soda! While not as strong as lye, a concentrated baking soda bath creates an alkaline environment that speeds up the Maillard reaction (the browning process) during baking, giving you a similar effect.
Preparing and Executing the Bath
- The Solution: Bring a large pot of water (about 8-10 cups) to a rolling boil. Carefully whisk in ½ to ¾ cup of baking soda. Be cautious, as it will foam up significantly! Reduce the heat to a simmer.
- The Dip: Using a slotted spoon or spider, gently immerse one shaped pretzel at a time into the simmering baking soda solution. Dunk for only 20-30 seconds per side, flipping once. Do not let them soak for too long, or your pretzels may develop an unpleasantly soapy flavor.
- Drain and Place: Remove the pretzel from the bath, allowing excess liquid to drain off. Place it onto a baking sheet lined with parchment paper or a silicone baking mat.
For a truly authentic taste that rivals the mall, perfecting your Master Auntie Anne's Pretzels: The Ultimate Copycat Recipe relies heavily on this step. It's the moment your humble dough transforms into a true pretzel.
Shaping, Seasoning, and Baking Your Homemade Masterpiece
With the dough perfected and the bath ready, it's time for the final steps that bring your Auntie Anne's dreams to life.
The Art of the Twist
Shaping pretzels can seem daunting at first, but practice makes perfect. Auntie Anne's uses a classic pretzel shape, and here's how to achieve it:
- Divide and Roll: After the first rise, gently punch down the dough and divide it into 8-12 equal pieces. Roll each piece into a long, thin rope, about 20-24 inches long and ½-inch thick. Aim for slightly fatter ends.
- Form the "U": Create a "U" shape with the rope.
- Twist: Cross the ends over each other twice.
- Fold: Bring the twisted ends down and press them firmly onto the bottom curve of the "U" to seal the shape.
If the classic twist feels too challenging, start with pretzel bites or sticks – simply cut the ropes into smaller pieces. They taste just as good!
The Final Flourish: Seasoning and Baking
Once shaped and bathed, your pretzels are almost ready for the oven. This is where you decide on their flavor profile:
- Classic Salted: Immediately after the baking soda bath, generously sprinkle coarse pretzel salt (or kosher salt) onto the wet surface of the pretzels. The moisture will help the salt adhere.
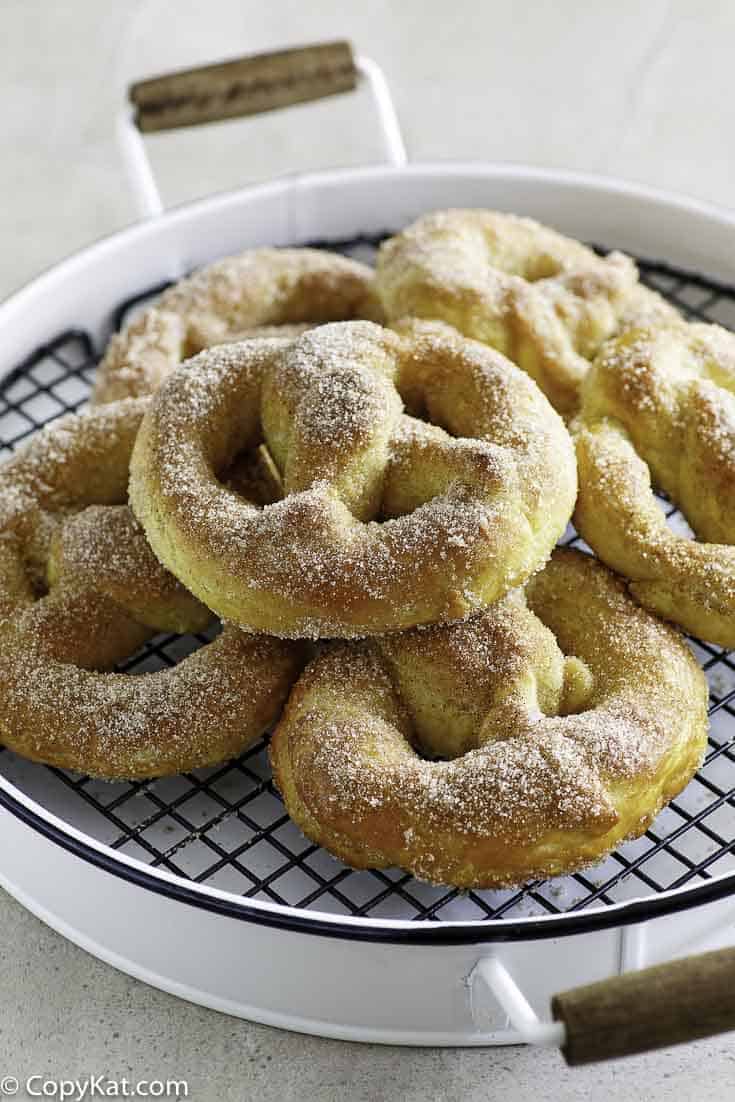
- Cinnamon Sugar: For sweet pretzels, skip the salt. After baking, brush the warm pretzels with melted butter, then toss or sprinkle generously with a cinnamon-sugar mixture (typically 1 part cinnamon to 4 parts sugar).
Preheat your oven to a high temperature, typically 400-450°F (200-230°C). Bake the pretzels for 8-12 minutes, or until they are a deep golden brown. Keep a close eye on them, as oven temperatures can vary.
Beyond the Basic: Customizing Your Auntie Anne's Experience
While the classic salted and cinnamon sugar are staples, your homemade pretzels open up a world of customization. If you're looking for an easy Auntie Anne's pretzel copycat that tastes just like the mall, these variations take it to the next level of enjoyment.
Sweet Pretzel Variations
- Sweet Glaze: After brushing with butter, instead of cinnamon sugar, drizzle with a simple glaze made from powdered sugar, milk, and vanilla extract.
- Cream Cheese Frosting: Take your cinnamon sugar pretzels to the next level by serving them with a side of homemade cream cheese frosting for dipping.
- Chocolate Drizzle: A drizzle of melted milk or white chocolate can turn a plain pretzel into a dessert masterpiece.
Savory Pretzel Innovations
- Garlic Parmesan: After baking, brush with melted garlic butter and sprinkle with grated Parmesan cheese and a pinch of dried parsley.
- Jalapeño Cheddar: Before the baking soda bath, sprinkle shredded cheddar cheese and finely diced pickled jalapeños onto the pretzel. Some even stuff the dough with cheese before shaping for a gooey surprise!
- Everything Bagel: After the bath, sprinkle with everything bagel seasoning for a savory, aromatic twist.
Dipping Delights
No pretzel experience is complete without the perfect dipping sauce.
- Cheese Sauce: Replicate Auntie Anne's iconic cheese dip with a simple stovetop cheddar cheese sauce.
- Honey Mustard: A sweet and tangy classic that pairs beautifully with savory pretzels.
- Spicy Mustard: For those who like a kick, a good brown mustard or dijon.
- Cream Cheese Dip: For sweet pretzels, a simple frosting or fruit dip is heavenly.
Troubleshooting Common Pretzel Pitfalls for a Flawless Batch
Even seasoned bakers encounter hiccups. Here's how to troubleshoot common issues when making your auntie annes pretzels copycat recipe:
- Pretzels are too tough/chewy: This often indicates over-kneading, too much flour, or not enough rise time. Ensure your dough is soft and pliable, not stiff.
- Not browning enough: Your oven might not be hot enough, or your baking soda bath wasn't strong enough (too little baking soda or not hot enough water). Make sure to bake at a high temperature.
- Soggy bottom: This can happen if the pretzels aren't adequately drained after the baking soda bath, or if they're overcrowded on the baking sheet, preventing proper air circulation. Always use parchment paper.
- Pretzels taste soapy: You likely soaked them too long in the baking soda bath. Remember, 20-30 seconds per side is plenty!
- Uneven shape: Practice makes perfect with shaping. Ensure your ropes are uniform in thickness to bake evenly. Don't be afraid to stretch the dough; it's quite resilient.
- Salt isn't sticking: Apply salt immediately after removing the pretzels from the baking soda bath while they are still wet. If they dry, the salt won't adhere properly.
Remember that every oven behaves differently, so don't hesitate to adjust baking times slightly based on your specific appliance.
There's immense satisfaction in pulling a batch of warm, perfectly golden-brown pretzels from your oven, knowing you've successfully created an authentic auntie annes pretzels copycat recipe. From the satisfying chew of the dough to the perfect balance of sweet or savory seasoning, every bite will remind you of your favorite mall treat. Don't be afraid to experiment with different toppings and dipping sauces to find your personal favorite. Armed with these tips and techniques, you're now ready to transform your kitchen into a beloved pretzel haven. Enjoy the process, and more importantly, enjoy your delicious, homemade Auntie Anne's-style pretzels!
